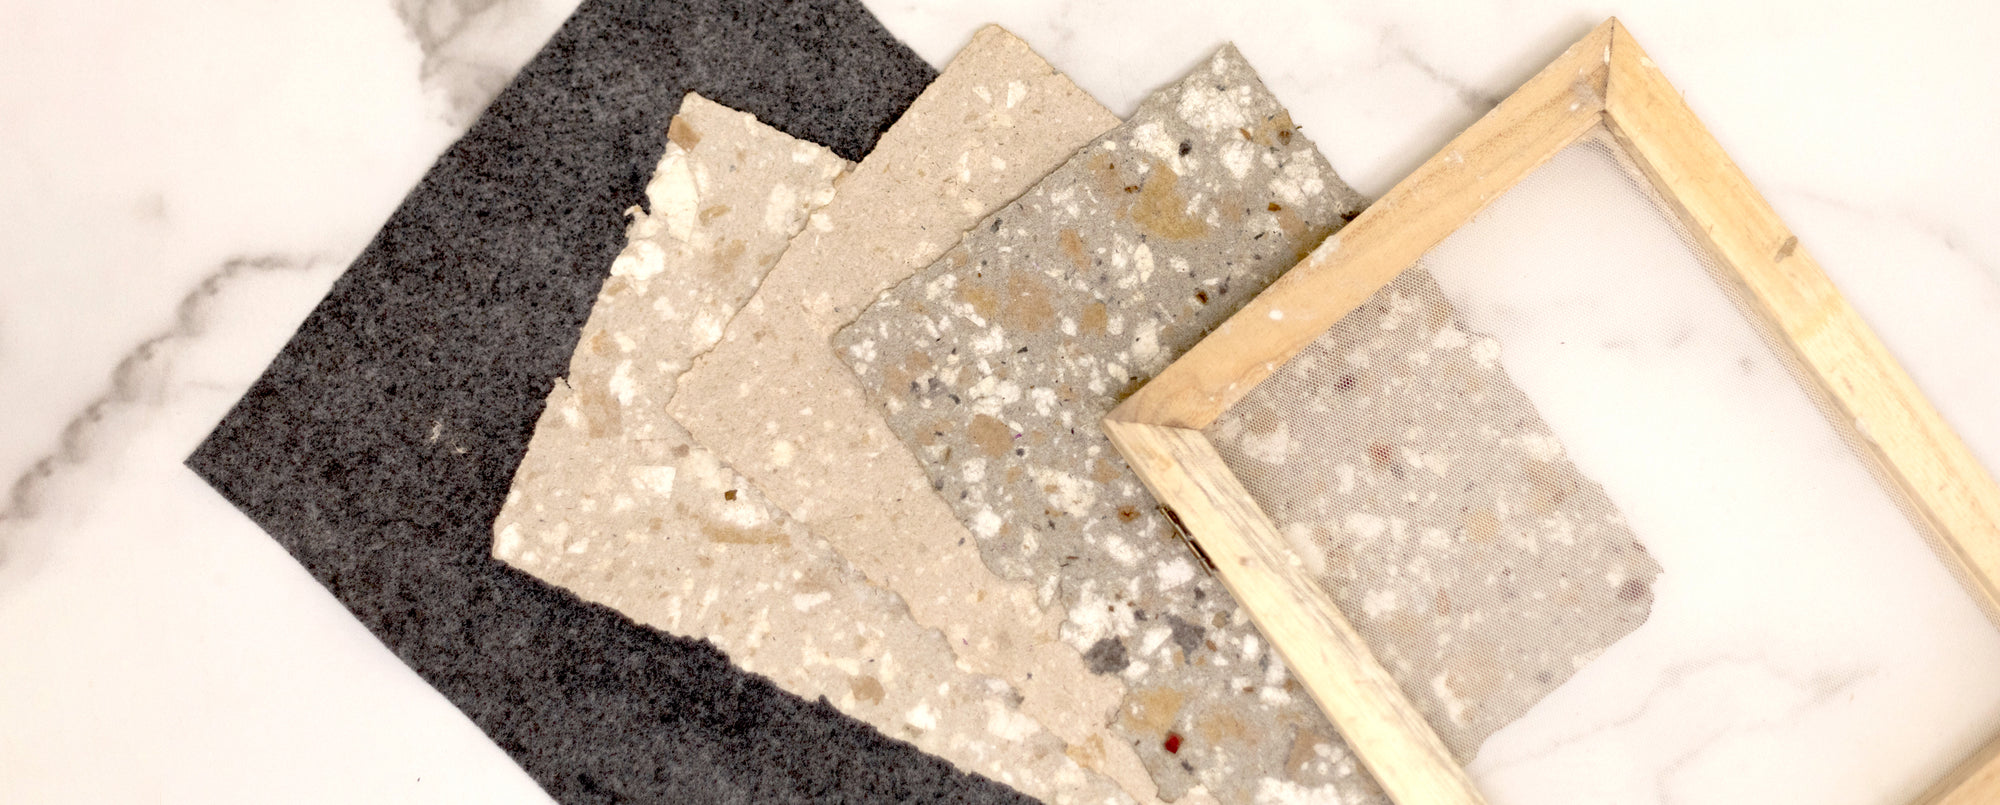
It's true that our paper tubes are 100% biodegradable, but it doesn't stop us from finding creative ways to reuse them. Our papermaking DIY walkthrough demonstrates zero waste packaging in action. Watch as we take regular paper tubes and turn them into artisanal kraft paper, perfect for drawings, personalized notes and letters.
Step1: Cut/Rip paper in small pieces and soak in water. Step2: Blend paper with water until it becomes pulp Step3: Fill container with 4-5 in of water Step4: Pour pulp into container Step5: Lower frame into water and gently agitate to move pulp to top of container Step6: Lift frame out of water Step7: Open frame and place single mesh sheet in between the frame Step8: Pat dry with sponge Step9: Remove wet pulp from frame single mesh sheet side down Step10: Let pulp air dry on felt Step11: Press under book to flatten
After receiving your order, we will send you a digitally mocked-up flat dieline showing the size and position of your artwork relative to the tube. We'll use the artwork you uploaded and add it to the top disc or side of the tube (single location only - either base or cap, not both), per your request. To get a good sense of what your logo will look like on the tube, we recommend you print out the dieline at 100% zoom on your home or office printer. Once approved, we will arrange print production. This process takes 2-3 weeks plus transit time, depending on the shipping method chosen during checkout.
We can only screen print vector artwork. We cannot screen print raster based imagery like jpegs or pngs.
Screen printing can only be done in one color and one location (top disc or side of the base or cap, not both).
Make sure your artwork is set in the exact color you want printed. We can print white, black, metallic silver, metallic gold, or any Pantone color.
Outline all fonts in your logo file.
Make sure you upload artwork in vector format for best print quality. Adobe Illustrator AI or PDF formats work best.